Diesel Service Report, April 19, 2023
ATSF Fairbanks Morse H12-44 SF560 Restoration (as built after Sept 1956)
The work to restore the cab is underway. Corey Wylde and volunteers working with him, have removed the seats, tool box, and a large portion of the old flooring. As with any of these restoration efforts, part of the job is to try and determine what were the original parts and color schemes and what was added later or significantly changed.
One of the first questions that arose was the authenticity of the seats. They looked to be from the right era but further research revealed that Fairbanks Morse offered options to the locomotive buyers. There was only one style Engineer’s seat offered but the Fireman’s seat could be a seat just like the one used by the Engineer or it could be a storage box with an upholstered lid. We have no paper work showing what seats AT&SF ordered but there is an Enginemen’s Manual that shows a line drawing depicting two round seats, rather than one round seat and a box seat.
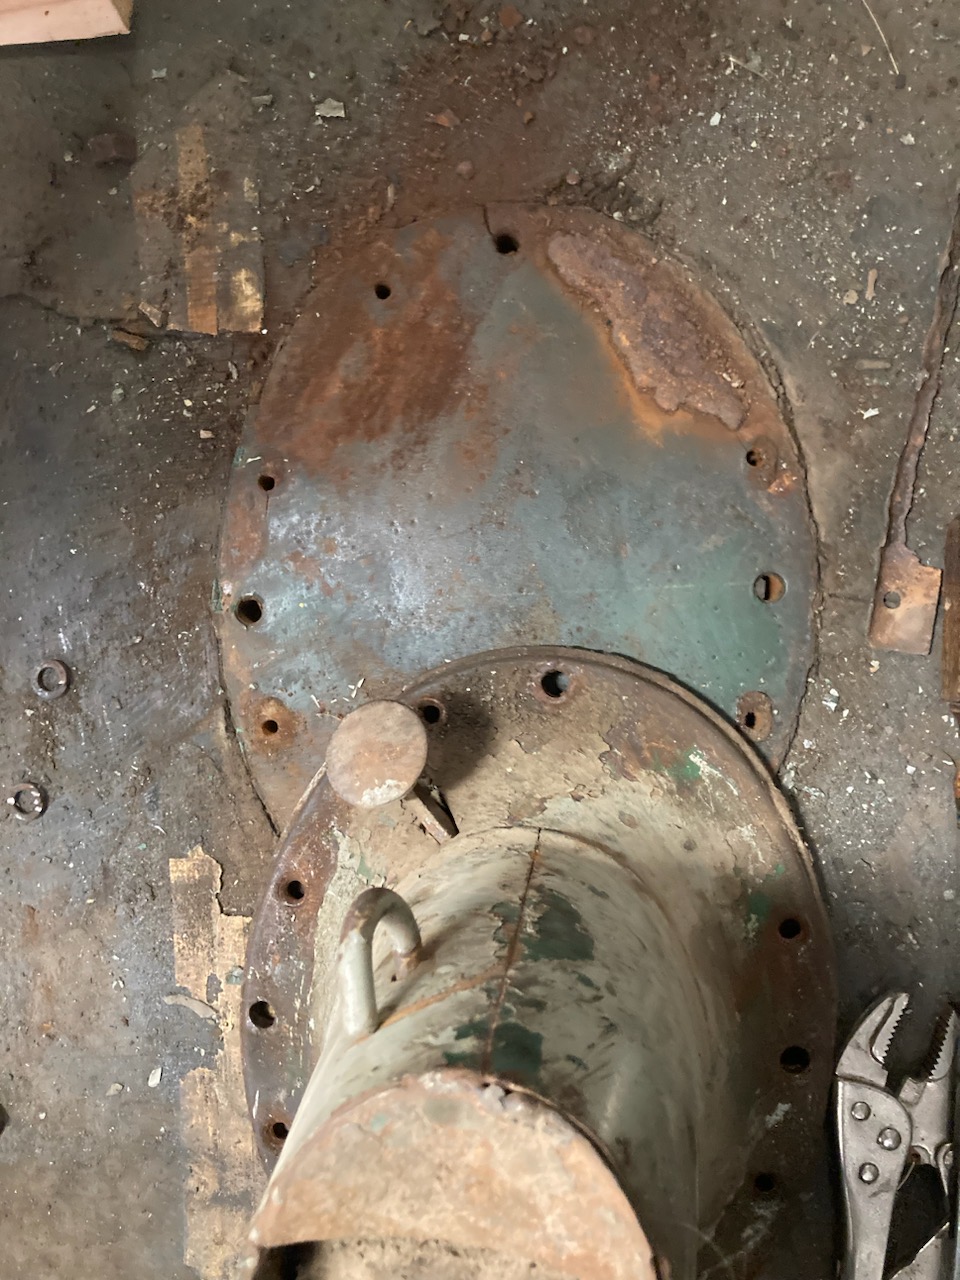
When the seats were removed, it was noted that there were four holes though the floor boards that the original seat base was bolted to. That matches the style of seat that was original to the locomotive. But the existing seats had additional mounting holes that did not match the floor bolt pattern and four obviously hand drilled newer holes. So we know for sure that the existing seats are not correct. There are at least three options. 1. Refurbish the existing seats 2. Find and install the correct seats. 3. Install more modern seats that are already in perfect condition. Obviously authenticity is important but if we can’t find the correct seats, then we have to make a decision regarding installing new style seats or spending the time and money trying to reuse the incorrect seats.
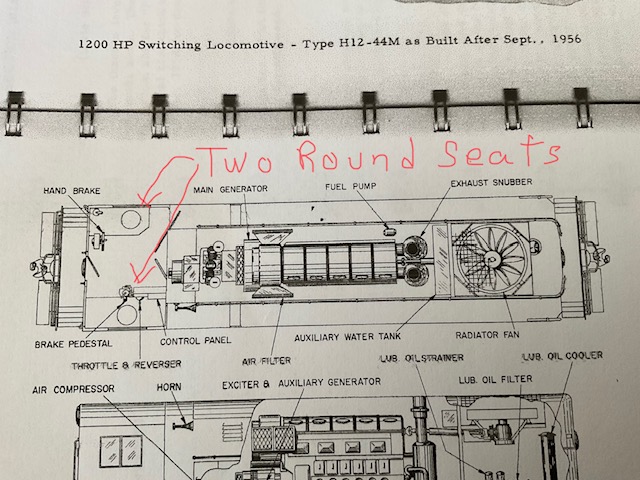
This line drawing shows the two round seats, not a box seat.
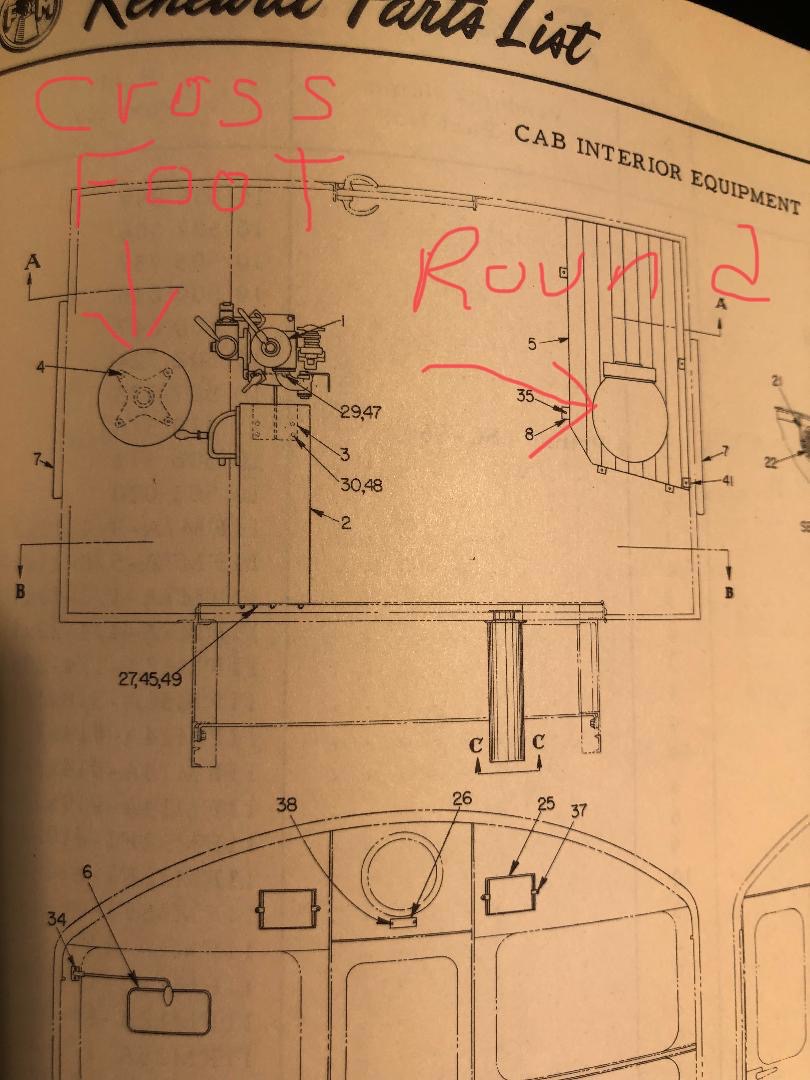
This shows the cross mount under the Engineer’s seat. From these pictures, we know what was original in 1956.
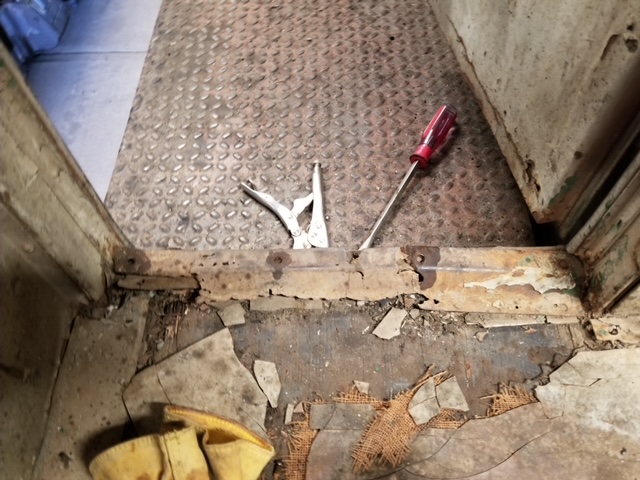
The floor of the cab is rotted out in numerous areas. The floor by specification of AT&SF purchase order was “linoleum covered plywood”. After years of leaking window and door seals, the floor disintegrated to the point where much of it has to be replaced. Corey and the guys removed the trim tin molding that kept the edges of the linoleum from curling up. Once they did that, the original style of linoleum became obvious. And in some places the original green color appeared to be close to original. This shows remnants of the burlap backing material plus shows the terrible shape the floor was in. Also note the rusted out door panel in the upper right of the picture.
 Because of the burlap backing on the linoleum, and its thickness, it was guessed that the original material was something called “Battleship Linoleum”. Research has found that original Battleship Linoleum was 1/4″ think with burlap backing. Recent research has revealed that some of the Battleship Linoleum that is offered today is only 20mm or 25mm thick. Actual 1/8″ linoleum should measure 32mm. Another supplier that says they have real 1/8″ material is sending samples for us to review for color, thickness, and flexibility. The prices that we are getting for this material is between $12 and $15 per sq ft. The cab is 10′ wide and about 6′ long so we will spend upwards of $900 on the special linoleum.
After a large portion of the center floor was removed, it was discovered that the wooden spacer beams under the plywood flooring, needed to be replaced. Carl Pickus took all the measurements and fabricated the replacement plywood piece and the wooden spacers.
Before any of the new material could be installed, Tim Johnson needle gunned the support metal structure. That will be sprayed with primer paint and then the wood attached for the new floor.
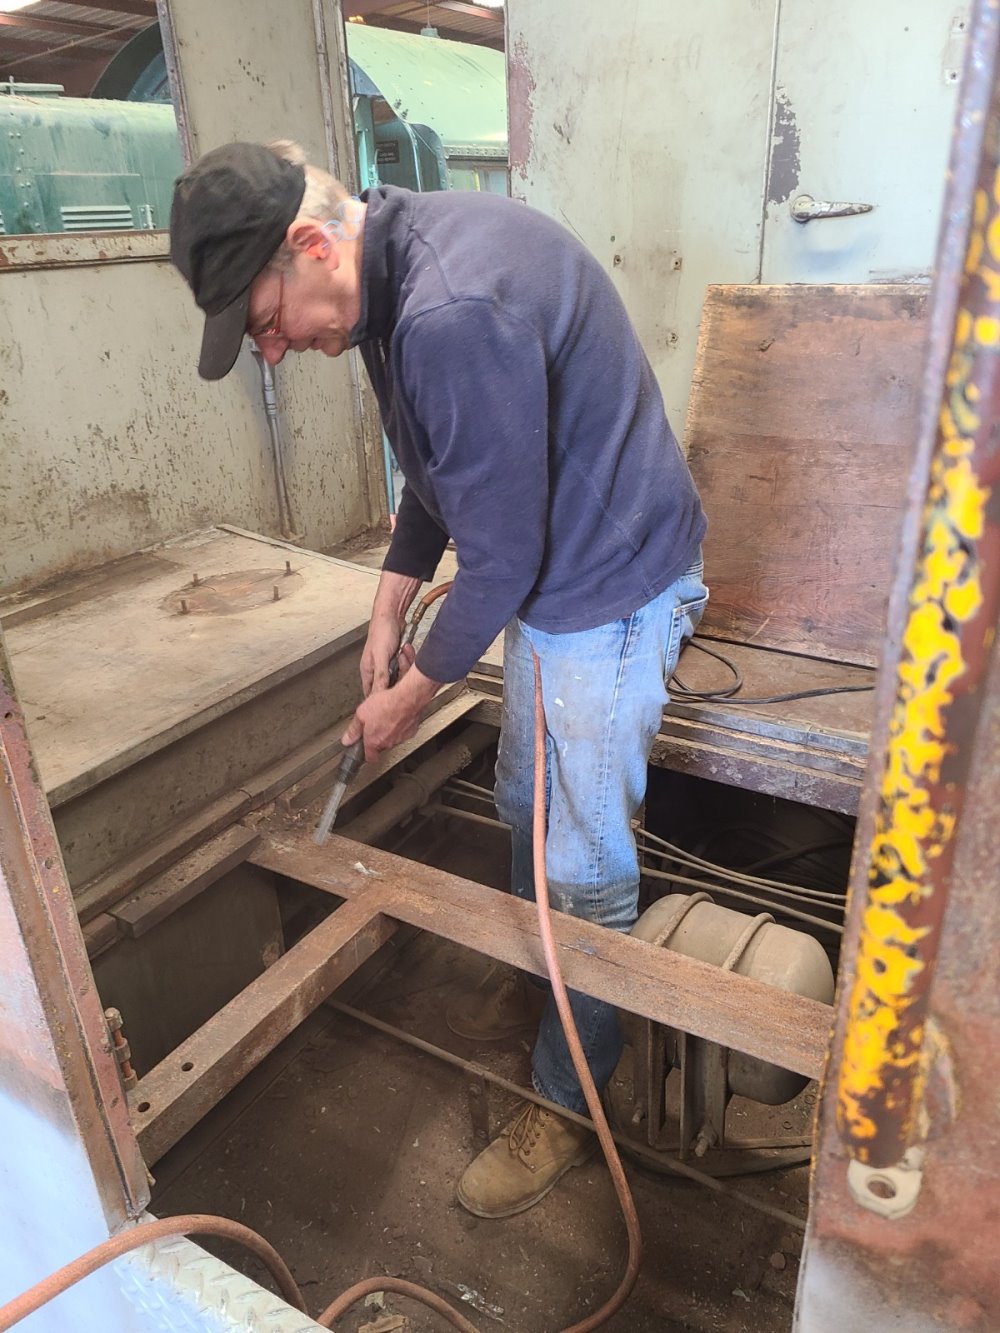
Tim with the needle gun.
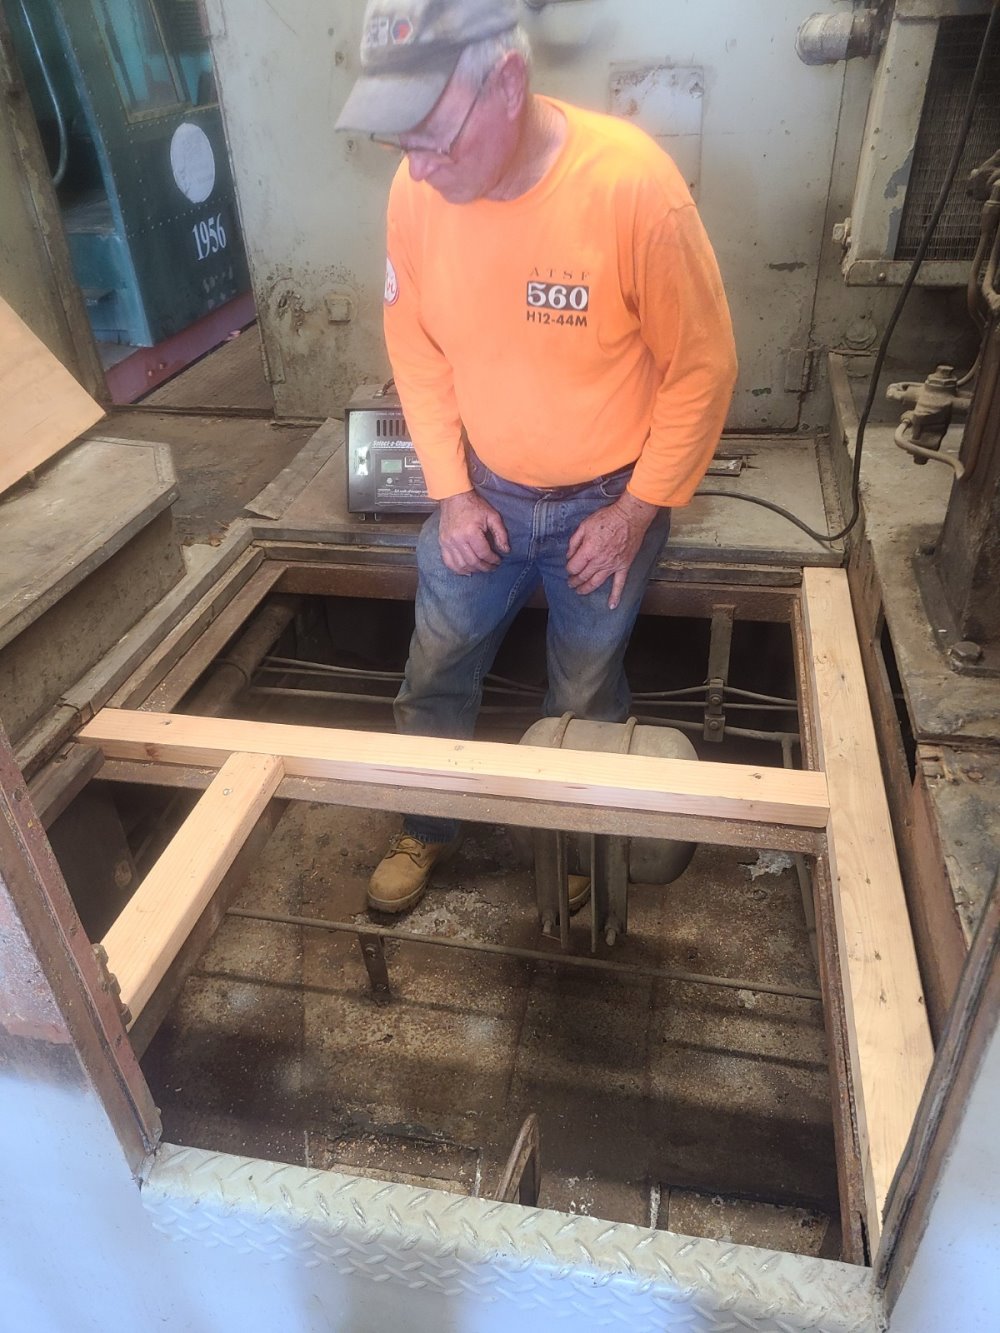
Carl is working on installing the new wood.
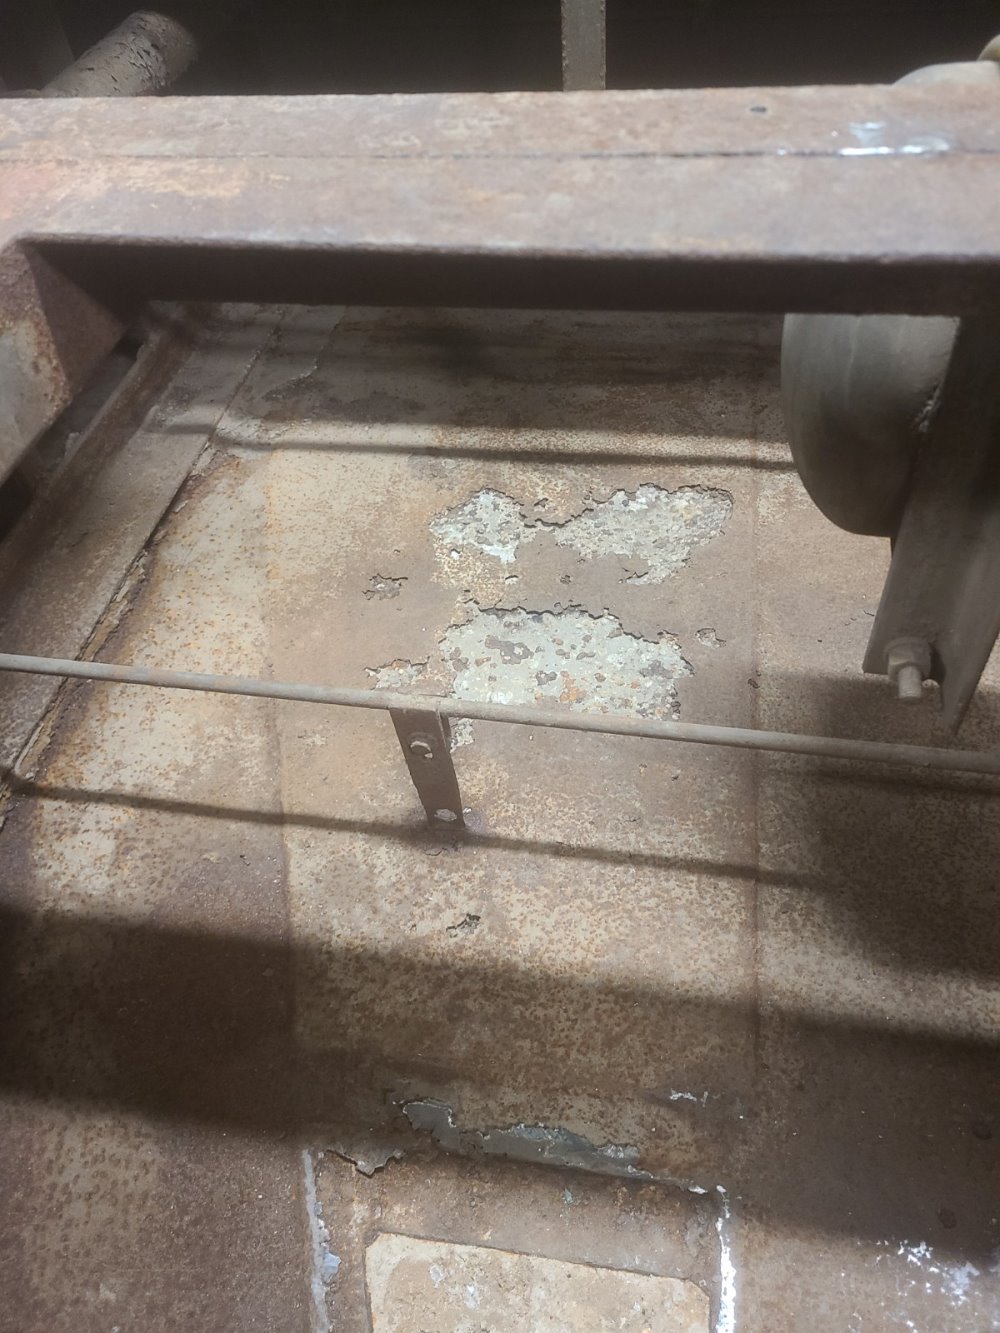 Over the years, water not only got onto the plywood floor, it seeped through and sat in the underfloor cavity. There it rusted out the sheet metal that covered concrete that was used for ballast. Of course water on concrete next to iron is a perfect condition for electrolysis to take place. And large portions of the underfloor pan are totally eaten away. This is an area that no one ever sees so to stabilize it we will paint it with thick POR15 epoxy paint. That will protect the area essentially forever. The open concrete is obvious through the remnants of dissolved metal.
The hand brake stand had to be removed to make room for repairing the plywood floor in that area. But the hand brake had many coats of peeling paint so Carl decided to take it home to refurbish it.
He removed all the paint and overhauled everything inside. Plus touched up the lettering on the cast lettering on the hand wheel.
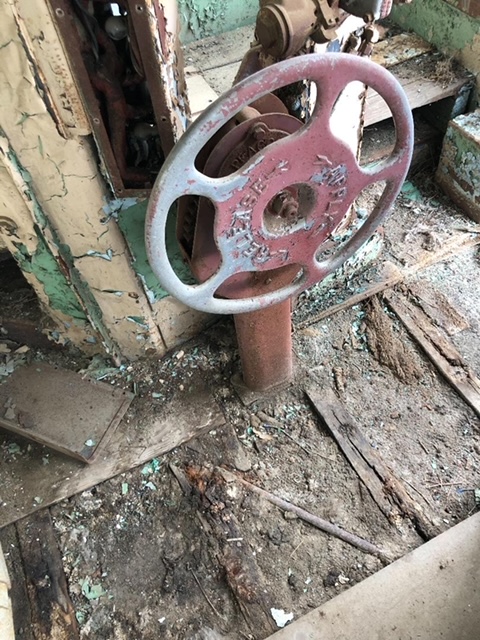
Before
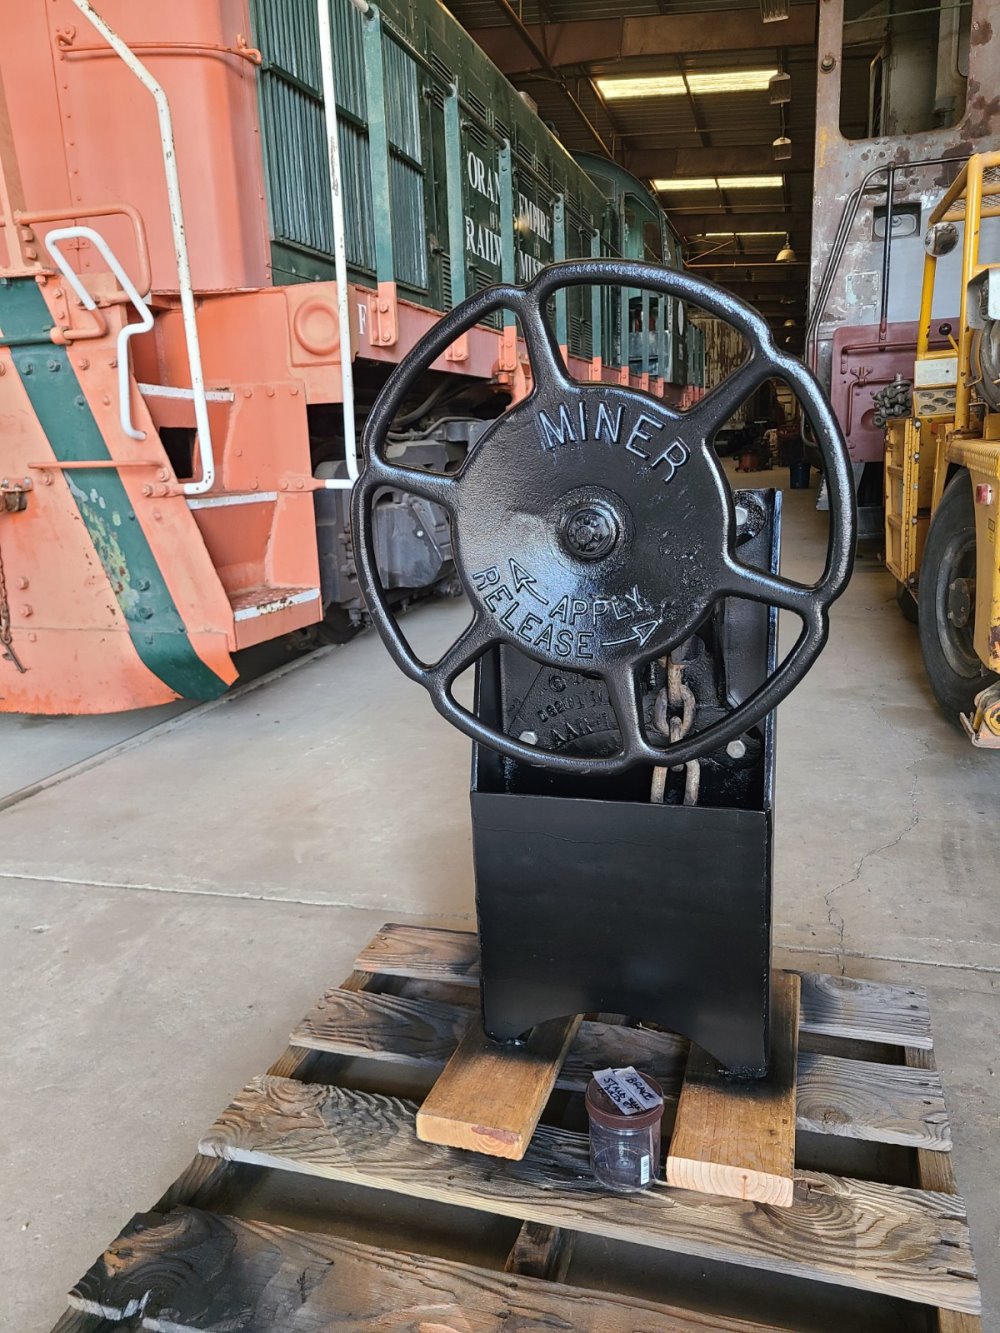
After!
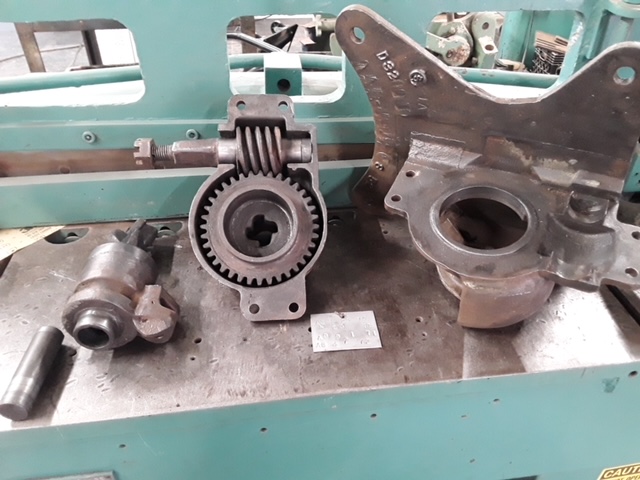
What we found interesting is that this hand brake does not use clutch plates or pawl cogs to keep the hand brake chain tight. It uses a worm gear mounted 90 degrees to a square cut gear. Its something we haven’t seen before.
The chain going from the handbrake to the truck brake beam is 10′ long. But when it was removed, severe wear and stretching of the links was seen. The chain size called out in the Fairbanks Morse parts book is 3/8″. But it appears that the stresses that can be applied to this chain are more than it can take. We will look at installing chain that is 1/8″ larger. That provides about 70% more strength and appears to fit the guide pulleys.
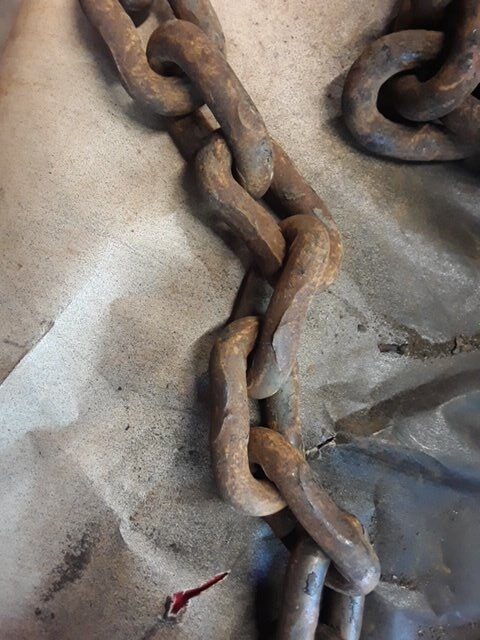

This shows the damage chain that was removed.
One of the next projects will be to get new glass measured, cut, and installed. It will be 1/4″ laminated safety glass. The problem is that all of the windows have rounded corners. That means the glass company that cuts the glass for us, will spend hours getting those rounded corners cut. Once we have the glass, then we have to purchase the correct gasket material. At this point we don’t have any guess as to the cost of the glass and gasket material.
It will be expensive.
